

News
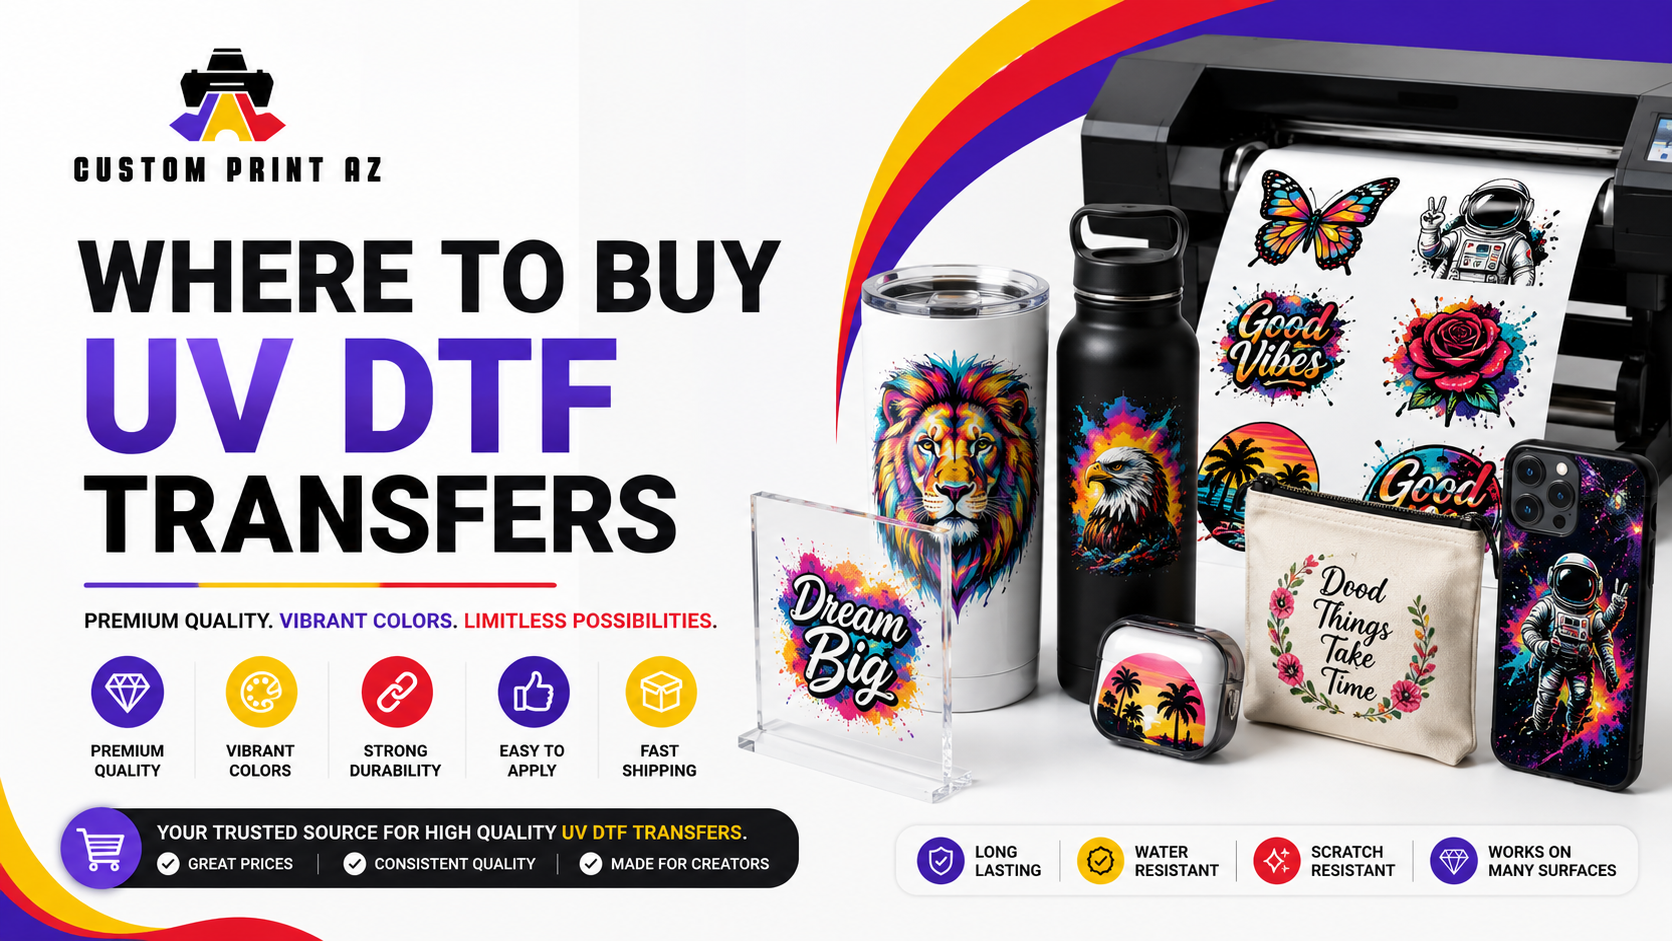

Best Place To Buy DTF Transfers
Best Place To Buy DTF Transfers: A Comprehensive Sourcing Masterclass The custom apparel market is growing at a phenomenal pace worldwide. E-commerce platforms allow independent clothing designers to launch global merchandise brands overnight. This rapid expansion increases the demand for reliable manufacturing solutions. Finding a reliable supplier for custom graphics is the most critical step for any print shop. Sourcing poor materials can quickly ruin your brand's reputation and lead to costly customer returns. This master sourcing guide examines the core factors involved in choosing a manufacturing partner. We will discuss commercial print workflows and detail exactly why selecting the right supplier is vital to your business growth. Table of Contents 1. The Shift Toward Outsourced Custom Transfer Sourcing 2. Crucial Quality Parameters When Evaluating Print Vendors 3. Navigating Shipping Logistics and Production Turnaround Times 4. The Cost Equation: Bulk Pricing Tiers vs. Hidden Waste Costs 5. Comparing Domestic Suppliers Against Overseas Distributors 6. Assessing Software Automation and Customer Design Dashboards 7. Ink Profiles and Safety Standards for Retail Compliance 8. Resolving Scaling Bottlenecks in Custom Merchandise Fulfillment 9. Step-by-Step Sample Verification Checklist for Print Shops 10. Selecting Your Long-Term Apparel Printing Partner 1. The Shift Toward Outsourced Custom Transfer Sourcing Historically, custom print shop owners believed that buying expensive machinery was the only way to scale production. They invested heavy capital into large industrial equipment, deep ventilation systems, and complex ink sets. However, running high-end machinery in-house introduces significant hidden costs. Printheads require constant maintenance, ink stocks naturally expire, and seasonal slow months can leave expensive equipment sitting idle. Because of these challenges, successful modern apparel brands are moving toward an outsourced model. They purchase ready-to-press graphics from specialized commercial manufacturers instead of printing them internally. This structural change allows shop owners to eliminate mechanical maintenance, lower fixed overhead costs, and focus entirely on design and marketing. This approach helps businesses scale safely without heavy capital risks. If you want to transition your shop to a lean, efficient model, sourcing high-grade graphic sheets is the ideal strategy. Check out the professional collections at DTF transfers to enhance your production fulfillment system instantly. Strategic Benefit: Outsourcing your printing allows you to offer full-color, complex designs on-demand. You only purchase the custom transfer sheets after your customers place a paid order on your e-commerce store. 2. Crucial Quality Parameters When Evaluating Print Vendors Not all commercial transfer vendors use the same materials or production standards. Buying purely based on the lowest price can lead to stiff, brittle prints that crack after a couple of wash cycles. A high-quality vendor always uses stable polyester film treated with advanced matte-release coatings. This specialized PET film holds onto ink drops perfectly, preventing colors from bleeding into each other. The white ink layer must be dense and fully opaque. This thickness is crucial because it acts as a background shield, preventing dark garment dyes from bleeding through your bright colored designs. Finally, examine the feel of the print on fabric. Top-tier manufacturers utilize finely ground polyurethane powders that yield a thin, soft, and flexible finish that matches the premium texture of retail clothing. 3. Navigating Shipping Logistics and Production Turnaround Times In the modern print-on-demand landscape, speed is everything. E-commerce customers expect their custom apparel orders to ship out within a few business days. A supplier with excellent print quality is of little use if their production turnaround takes two weeks. Look for vendors that offer clear, reliable production schedules and fast shipping options. Top-tier suppliers often process and ship custom orders within 24 to 48 hours. This rapid turnaround allows you to maintain a lean inventory and fulfill client orders without long delays. Ensure your chosen vendor packs your orders securely. Transfer sheets must be sealed in moisture-proof plastic bags and shipped in rigid boxes to prevent damage or warping during transit. 4. The Cost Equation: Bulk Pricing Tiers vs. Hidden Waste Costs While managing your production expenses is important, focusing solely on the cheapest price per square inch can often hurt your business in the long run. The Real Cost of Material Waste If a cheap supplier has a high 15% print failure rate, you will waste valuable time and blank garments replacing ruined items. Sourcing premium, reliable transfers keeps your production running smoothly, minimizing waste and protecting your long-term profits. Look for vendors that offer clear volume discounts and bulk tier pricing structures. This transparency allows your material costs to drop naturally as your business grows and order volumes increase. To view an example of clear, competitive bulk options designed for commercial scaling, visit the printing experts at CustomPrintAZ. Their transparent pricing helps shops budget accurately across varied project sizes. 5. Comparing Domestic Suppliers Against Overseas Distributors Many new business owners consider ordering cheap materials from overseas wholesale websites to save on upfront costs. However, international sourcing introduces significant supply chain risks. Overseas shipping can take weeks and is often prone to unexpected customs delays. If a batch arrives damaged or printed incorrectly, processing a return and waiting for replacements can disrupt your business for a month. Partnering with a reliable domestic supplier provides much greater stability. Domestic vendors offer faster shipping, consistent material quality, and accessible customer support teams that speak your language. Working with a domestic partner also allows you to handle tight deadlines with confidence. You can accept rush orders from corporate clients, knowing your production materials will arrive on time. 6. Assessing Software Automation and Customer Design Dashboards The ordering process should be smooth, simple, and automated. Managing custom print files manually through back-and-forth emails is slow and prone to errors. Look for suppliers that provide an intuitive online design dashboard. A modern platform allows you to upload artwork files, check image resolutions, and build custom gang sheets directly in your web browser. Automated systems also provide real-time tracking updates for your orders. This tracking visibility helps you manage your production schedule and keep your customers informed about their shipments. These digital tools significantly reduce administrative mistakes. They ensure your artwork goes straight from your computer to the print line exactly as intended, saving time and preventing material waste. 7. Ink Profiles and Safety Standards for Retail Compliance Modern consumers care deeply about product safety and environmental sustainability. Clothing brands must verify that their manufacturing materials are safe for daily wear. Ensure your transfer supplier uses high-grade inks that comply with international safety standards like OEKO-TEX certification. This independent verification guarantees that the prints are entirely free from harmful heavy metals and toxic chemicals. Using certified inks is especially critical when manufacturing custom apparel for infants, children, or sensitive skin types. It ensures your products are safe and retail-ready. Using safe, eco-friendly materials also enhances your brand's marketability. You can proudly advertise your clothing line as safe and sustainable, attracting eco-conscious consumers and building brand loyalty. 8. Resolving Scaling Bottlenecks in Custom Merchandise Fulfillment As your custom apparel brand begins to scale, managing large order volumes can create unexpected production bottlenecks in your shop. If you print everything in-house, large holiday orders can easily overwhelm your team. Managing constant printer cleanings and powder applications can slow down your entire fulfillment workflow. Utilizing pre-printed commercial sheets helps you bypass these production bottlenecks completely. Your team can focus all their energy on the final heat-pressing step, which takes less than twenty seconds per shirt. This operational efficiency allows you to triple your daily production volume without hiring extra staff or buying more machinery. It keeps your business agile and ready to handle sudden demand spikes smoothly. 9. Step-by-Step Sample Verification Checklist for Print Shops Before committing to a long-term transfer supplier, you should always order a sample pack to test their print quality firsthand on your own heat press equipment. Step 1: Check Edge Sharpness and Small Details Examine the sample print under bright light. Ensure small text characters and fine vector lines are sharp, crisp, and completely free from fuzzy borders or ink smudging. Step 2: Evaluate the Opacity of White Backing Ink Press the sample design directly onto a dark fabric like a black cotton t-shirt. Verify that the white backing blocks the dark background completely, keeping the top colors bright and vibrant. Step 3: Perform a Tensile Stretch Test Gently pull the printed fabric in multiple directions. The design should expand smoothly along with the fabric fibers and snap back into shape without cracking or splitting. Step 4: Run a Rigorous Laundry Wash Test Wash the decorated test garment through 5 to 10 normal laundry cycles using hot water. Check for any signs of color fading, edge lifting, or surface peeling after the washes. Verification Step Target Quality Standard Pass / Fail Status Indicator Visual Accuracy Zero ink bleeding, sharp details down to 1-pixel borders Must verify under high-intensity lighting Opacity Level Complete background blockout on dark black cotton fabrics Colors must look vibrant with zero dullness Elastic Recovery The graphic must stretch easily and return to shape without cracking Test along high-tension fabric seams Wash Longevity Zero peeling or fading after multiple laundry cycles Inspect fine lines carefully post-wash 10. Selecting Your Long-Term Apparel Printing Partner Direct-to-Film transfers have fundamentally transformed the garment decoration industry. They offer an incredibly efficient way to scale production while keeping upfront costs low. By eliminating time-consuming machinery maintenance, lowering inventory risks, and delivering rich colors on almost any fabric, this technology helps custom apparel brands grow faster and safer. Finding a trusted supplier ensures your prints maintain consistent quality across every order, helping you build a professional reputation and satisfy your clients over the long term. Ready to streamline your custom apparel production and access retail-ready quality? Visit the printing experts at CustomPrintAZ to order vibrant, commercial-grade custom transfers that will elevate your brand today!
Learn more
Where Can I Buy DTF Transfers
Where Can I Buy DTF Transfers? The Ultimate 2026 Buying Guide The apparel decoration industry is changing fast. Custom apparel decoration relies heavily on modern printing methods. Direct-to-film technology leads this massive transformation. Finding the right supplier can determine your business success. Many print shops face the same difficult question. Where can I buy DTF transfers that offer premium quality? This extensive guide covers everything you need to know. We will explore top sources, quality metrics, and ordering processes. Table of Contents 1. Understanding DTF Technology 2. Why Source Professional Transfers? 3. Where to Buy Premium DTF Transfers 4. How to Evaluate Transfer Vendors 5. Common Buying Mistakes to Avoid 6. Application Best Practices 1. Understanding DTF Technology Direct-to-film printing utilizes specialized digital inkjet technology. Printers apply unique textile inks directly onto a clear PET carrier film. A hot-melt adhesive powder is applied next. The powder fuses to the wet ink through heat curing. This method differs significantly from older garment decoration techniques. It bypasses the traditional screen creation process entirely. You do not need complex pretreatments like direct-to-garment printing requires. Learn more about direct-to-film printing on Wikipedia. The technology offers remarkable versatility for diverse fabric options. It adheres beautifully to standard cotton blends. It works perfectly on slick synthetic polyesters. It even applies smoothly to tough nylon surfaces. Modern commercial printers use advanced printheads for exceptional resolution. They produce incredibly vibrant color gamuts. The final prints stretch cleanly without cracking or showing distortion. This makes the method ideal for activewear brands. 2. Why Source Professional Transfers? Buying commercial equipment requires substantial capital investment. Commercial machinery creates high overhead costs for small shops. Sourcing pre-printed transfers provides an efficient financial alternative. It lowers entry barriers for new apparel brands. Professional suppliers use industrial-grade production setups. They maintain strict climate-controlled printing environments. This consistency guarantees flawless ink curing cycles. Your business gains access to industrial output without the physical maintenance hassle. Sourcing ready-to-press films streamlines your entire workflow. You simply upload your digital artwork online. The supplier prints, powders, and ships the physical sheets. Your team focuses purely on heat pressing and customer marketing. This business model scales your production effortlessly. You can handle small custom orders comfortably. You can also accept massive corporate orders without production bottlenecks. It optimizes your overall operational efficiency. The Efficiency of Outsourcing Outsourcing allows apparel decorators to offer unlimited colors. You can fulfill orders without cleaning screens or maintaining expensive printheads daily. It saves valuable time and labor budget. 3. Where to Buy Premium DTF Transfers Choosing a reliable supplier remains your most critical decision. The online marketplace contains many low-quality print operations. You need a trusted partner focused on commercial excellence. We highly recommend visiting the comprehensive catalog at Custom Print AZ. They specialize in high-resolution, durable custom film prints. Their production system utilizes premium raw materials for lasting results. You can browse their specific commercial collections directly. Check out their dedicated options for DTF transfers online. This collection serves both independent designers and high-volume apparel businesses. Supplier Type Pros Cons Specialized US Print Shops Fast shipping, premium quality, great support Higher initial base price Overseas Hubs Very low unit costs Long shipping times, poor quality control Local Printers Local pickup options Limited production capacity Dedicated domestic suppliers consistently provide superior color management. They understand specific local market quality expectations. Their customer support agents handle file preparation questions accurately and promptly. 4. How to Evaluate Transfer Vendors Never choose a supplier based purely on the lowest price. Low prices often mean cheap inks and brittle adhesive powders. Look carefully at the specific materials the shop uses. Order a sample pack before committing to large jobs. Test the sample prints on different fabric types. Check the overall opacity of the white ink layer. The white layer must block the garment color completely. Key Factors to Assess: Stretchability: The cured design must stretch naturally with the fabric. Washability: Prints should survive over fifty laundering cycles without fading. Turnaround Time: Fast shipping keeps your customers satisfied. Software Infrastructure: Easy online builders simplify your file uploading process. Review the supplier's specific artwork file guidelines closely. Excellent vendors accept vector formats like PDF or SVG. They also accept high-resolution raster files with transparent backgrounds. Clear file instruction prevents unexpected printing errors. 5. Common Buying Mistakes to Avoid Many beginners upload low-resolution web images for printing. Pixels become highly visible when enlarged onto garments. Always use artwork created at 300 DPI minimum. This ensures clean, sharp design edges. Ignoring correct color profiles can create disappointing final prints. Printers use CMYK color spaces to generate physical colors. Designing in RGB spaces can cause unexpected color shifts. Convert your artwork files before submission. Forgetting to verify transparency settings causes ruined prints. Tiny stray pixels can capture white backing ink accidentally. Clean your design edges thoroughly using reliable photo editing software. Inspect your artwork backgrounds at high zoom levels. 6. Application Best Practices Even premium transfers can fail if applied incorrectly. You must use a professional-grade heat press machine. Manual home irons cannot deliver sufficient, uniform physical pressure. Consistent heat and heavy pressure are essential. Follow the manufacturer's exact recommended temperature settings. Most standard formulations cure between 285°F and 320°F. Press the garment for twelve to fifteen seconds. Let the film cool completely if using cold-peel varieties. Always perform a second finishing press for maximum durability. Cover the exposed design with parchment paper or a silicone sheet. Press again firmly for about five seconds. This embeds the ink deeply into the textile fibers. Ready to Elevate Your Apparel Brand? Stop settling for low-quality prints that crack and fade. Source your commercial-grade designs from trusted industry experts today. Explore premium options at Custom Print AZ or check out the full DTF transfers collection now. Shop Premium Transfers Now
Learn more
How To Print Uv Dtf Transfers
How to Print UV DTF Transfers: The Ultimate Production Guide The custom merchandise industry is growing rapidly. Business owners constantly seek innovative customization methods. Traditional printing techniques often face physical limitations. UV DTF printing solves these common production challenges. This modern technology creates highly durable sticker transfers. It requires no heat press for final application. You can apply these designs to hard surfaces easily. This comprehensive guide covers the entire printing process step by step. Guide Directory 1. What is UV DTF Printing? 2. Required Equipment and Materials 3. Artwork Preparation Guidelines 4. The Step-by-Step Printing Process 5. The Crucial Lamination Stage 6. Troubleshooting Common Print Issues 7. How to Apply the Final Transfers 1. What is UV DTF Printing? UV DTF combining ultraviolet curing technology with direct-to-film transfer methods. It utilizes a specialized digital inkjet printer. The printer applies ultraviolet-curable inks onto a primary film layer. Instantly, strong ultraviolet lamps cure the liquid ink drops. The process creates prints with structural dimension. It layers white ink, color ink, and clear varnish systematically. This build-up generates a distinct three-dimensional texture. The final look mimics high-end direct industrial printing. This technology uses specialized chemical compounds. The inks are engineered to cure under specific light wavelengths. You can learn more about the science of UV curing on Wikipedia. This cross-linking process creates an incredibly durable bond. Unlike standard garment decoration, this method targets rigid items. It works perfectly on glass bottles, ceramic mugs, and metal flasks. It adheres beautifully to wood panels, hard plastics, and slate materials. The versatility opens brand new product lines for print shops. 2. Required Equipment and Materials You cannot use a regular document printer for this method. Industrial setups require highly specialized hardware components. Investing in the proper tools ensures commercial-grade output quality. First, you need a dedicated UV DTF printer. These machines feature specialized printhead configurations. They must handle multiple fluid types simultaneously. They also require built-in white ink circulation systems. Second, you need specialized consumables. The process requires Film A, which carries the initial adhesive layer. You also need Film B, which acts as the protective transfer tape. Premium quality films prevent unexpected silvering issues during lamination. If you prefer to bypass equipment maintenance, outsourcing is smart. You can buy pre-printed designs easily. Discover professional options at Custom Print AZ today. They manage the technical production machinery for you. Material Component Primary Function Key Quality Indicator Film A (Base Film) Holds the print and adhesive glue High dimensional stability under heat Film B (Laminating Film) Transfers design to final object Balanced tackiness for easy peeling UV Varnish Provides glossy scratch protection High optical clarity without yellowing You must use specific UV-curable textile inks. These formulas maintain flexibility after curing. Standard rigid UV inks might crack when peeled from the carrier film. Always match your ink formula to your specific film brand. 3. Artwork Preparation Guidelines Perfect prints begin inside your graphic design software. Raster images must have high resolution. Aim for 300 pixels per inch minimum. Low-resolution artwork creates jagged, pixelated print edges. Vector graphics offer the absolute best production results. They scale infinitely without losing structural sharpness. Keep your design background perfectly transparent. Any solid white background blocks will print as white ink circles. You must configure your spot color channels correctly. The RIP software needs specific paths for white and varnish layers. Name your spot channels exactly as your software manual dictates. Incorrect naming conventions break the automated printing queue. For large production runs, utilize gang sheets. Arrange multiple designs closely on a single layout page. Leave exactly one-quarter inch between individual graphics. This space allows for safe manual cutting later. If you are exploring diverse decoration types, check alternative methods. Examine standard DTF transfers for fabric customization projects. Different jobs require different specialized technical approaches. Important File Check Always double-check your transparency layer before sending files to the print queue. Tiny stray pixels can trigger accidental white ink dots. Clean your design canvases thoroughly. 4. The Step-by-Step Printing Process Start by powering on your machinery. Run a manual printhead nozzle check. This step ensures every ink channel fires correctly. Missing lines cause visible banding across your final transfers. Load Film A into the feeding mechanism. Ensure the printable adhesive side faces upward. Adjust the media guide tension carefully. The film must track perfectly straight through the printing bed. Perform a nozzle check to verify ink consistency. Load the adhesive-coated Film A into the printer. Send the prepared artwork file through the RIP software. Monitor the ultraviolet lamps during the print cycle. The printheads will deposit three distinct layers sequentially. First, the machine prints the white ink base layer. Second, it applies the colored CMYK image directly on top. Finally, it drops the clear glossy protective varnish coating. The integrated ultraviolet lamps follow the printheads closely. They emit strong light to solidify the liquid layers immediately. Ensure your vacuum bed is active. The suction keeps the film flat, preventing costly printhead strikes. 5. The Crucial Lamination Stage Lamination seals the printed graphics permanently. It bonds the cured inks to the Transfer Film B. This step requires a roll laminating machine. Manual lamination often introduces destructive air pockets. Set your laminator to the recommended warm temperature setting. Most professional films require around 120°F to 140°F. Mild heat softens the adhesive slightly. This softening ensures a flawless, bubble-free bond across the sheet. Feed the printed Film A and Film B together slowly. The pressure rollers must exert firm, even force. Watch the exit side carefully for any wrinkling. Creased film completely ruins the underlying graphics. Once laminated, trim the individual designs using sharp scissors. Store the cut transfers in a dust-free storage container. Keep them away from direct sunlight exposure. Ambient UV rays can degrade the adhesive properties over time. 6. Troubleshooting Common Print Issues Poor ink adhesion usually signals incorrect curing lamp intensity. Lamps lose power as they age over time. Check your lamp hours regularly. Clean the protective quartz glass over the lamps weekly. Silvering describes tiny air bubbles trapped under the lamination film. This happens when roller pressure is insufficient. Increase the laminator pressure slightly. Slowing down the lamination speed also eliminates silvering effectively. If the design lifts off the target object, check your cleaning habits. Hard substrates collect oils from human fingers. Wipe every surface with isopropyl alcohol before application. Cleaning guarantees a strong, permanent chemical bond. 7. How to Apply the Final Transfers Applying the completed transfer is incredibly straightforward. It requires no complex industrial machinery. First, clean the target item thoroughly. Let the surface dry completely before proceeding. Peel the thick carrier Film A away carefully. Your printed design should stick firmly to the clear Film B. Position the graphic over your object precisely. You cannot reposition the sticker once it touches the surface. Press the transfer down starting from the center outward. Use a plastic squeegee tool to apply heavy manual pressure. Rub the entire design firmly. Pay extra attention to thin text lines and sharp corners. Carefully peel away the clear Film B transfer tape slowly. Keep the tape flat against the surface while pulling. If any design edge lifts, press it down again. Rub the lifted area firmly before attempting to peel again. Skip the Production Hassle Today Printing requires expensive machinery and tedious maintenance. You can get professional results without buying a costly UV printer setup. Order custom prints directly from Custom Print AZ. Browse our high-quality DTF transfers collection for your business needs. Order Custom Transfers Now
Learn more
How To Design DTF Transfers
How to Design DTF Transfers: The Ultimate 2026 Graphic Guide Creating beautiful apparel requires a deep understanding of modern digital design rules. The custom printing market moves forward exceptionally fast. Old-fashioned printing guidelines do not apply to contemporary film methods. Designers must update their technical habits. Direct-to-film production gives creators incredible artistic freedom. You can print complex multi-colored artwork seamlessly. However, digital design files must meet strict mechanical requirements. This massive guide teaches you how to prepare flawless transfer artwork. Design Guide Sections 1. Digital Foundations: Vector vs. Raster Graphics 2. Managing Color Spaces for Physical Curing 3. Transparency Secrets and Edge Transparency Problems 4. Building High-Efficiency Digital Gang Sheets 5. Typography Rules and Line Weight Minimums 6. Testing Digital Proofs and Sample Swatches 7. Submitting Your Files to Premium Print Vendors 1. Digital Foundations: Vector vs. Raster Graphics Every great transfer design begins with choosing the correct file type. Graphic design tools generally produce two distinct types of digital data. You will work with either vector paths or raster pixel grids. Vector graphics use mathematical formulas to build shapes, lines, and curves. Programs like Adobe Illustrator generate these clean, flexible files. Vector designs scale upwards indefinitely without losing their perfect edge sharpness. Learn more about vector graphics on Wikipedia. Raster files use a fixed grid of individual pixels to build complex images. Photographic files always use this pixel-based format. When expanding a small raster file, the image becomes visibly blurry. Pixelated edges cause poor print quality on physical clothing. If you must use raster artwork, check the resolution settings. Your working canvas must use a resolution of 300 DPI minimum. Low-resolution internet images look terribly pixelated when printed onto clothing. 2. Managing Color Spaces for Physical Curing What you see on a glowing screen can look different on fabric. Computer screens display vibrant artwork using the standard RGB color space. This mode blends red, green, and blue light to generate colors. Commercial film printing equipment operates inside a physical CMYK color space. Printers mix cyan, magenta, yellow, and black inks together. This fundamental difference means screens can display bright neon shades that physical ink cannot replicate. Design Space Factor RGB Screen Environment CMYK Print Environment Primary Medium Emitted digital light pixels Physical liquid chemical inks Maximum Brightness Extremely high neon luminosity Standard reflective natural finish Target Workspace Use Websites and social media posts Commercial garments and packaging Convert your active design canvas into CMYK mode before finalizing details. This color conversion reveals any unexpected shifts early in your workflow. It allows you to adjust dull color tones before submitting the file. The Power of White Ink Layers Direct-to-film machines print a solid white ink layer directly behind your colors. This white backing makes your designs fully opaque on dark shirts. Clean color data helps the software apply this backing perfectly. 3. Transparency Secrets and Edge Transparency Problems Managing alpha channel transparency is a critical step in transfer design. Your custom graphics must feature completely transparent background layers. Any lingering white background blocks will print as solid shapes on your apparel. Avoid using soft, semi-transparent edges or glowing drop shadows. Digital printers apply a solid white backing layer beneath all visible pixels. If a pixel is semi-transparent, the white backing can peek through around the edges. This issue creates a distracting white outline around your smooth gradients. Ensure your design edges are sharp, crisp, and entirely solid. Use hard masking tools to remove any faint, stray background pixels cleanly. 4. Building High-Efficiency Digital Gang Sheets A gang sheet allows you to place multiple graphics onto a single printing roll. This technique saves space and lowers production costs significantly. It helps you get the maximum value from your printing budget. Set up your master artboard to match the exact width required by your printer. A standard commercial width is twenty-two inches wide. You can extend the canvas length downward as far as your project requires. Leave a clean margin of at least 0.5 inches between different logos. This empty space gives you plenty of room to cut out individual designs safely. It prevents you from accidentally slicing into nearby graphics later. Common Overlapping Mistakes Never let the invisible boundary boxes of your files overlap each other. Overlapping bounding boxes can confuse automated print systems. This error can create unwanted blank areas in your finished prints. 5. Typography Rules and Line Weight Minimums Small, delicate design elements require special attention during preparation. Very fine lines may not hold enough adhesive powder during production. If a line lacks adhesive, it will peel off the garment during washing. Maintain a minimum line thickness of 0.02 inches for all parts of your artwork. If your design features thinner lines, thicken them slightly using stroke adjustments. This step ensures every detail bonds permanently to the fabric. Convert all text layers into solid vector paths before saving your work. If a print shop lacks your specific font file, the text can distort. Turning text into outlines preserves your typography style perfectly on any computer. 6. Testing Digital Proofs and Sample Swatches Never launch a massive print run without inspecting a sample first. Zoom in close to your artwork at a 400 percent view level. This close inspection reveals hidden pixel errors and ragged edge lines clearly. Print your finished digital layout onto standard paper using a home printer first. This simple test helps you verify the real-world scale of your graphics. It ensures your chest logos and sleeve labels are sized correctly for your clothing sizes. 7. Submitting Your Files to Premium Print Vendors Once your digital layouts are flawless, select a premier manufacturing partner. Sourcing from a top-tier print house guarantees excellent color depth and wash durability. We highly recommend utilizing the commercial printing services at Custom Print AZ. They use industrial-grade production systems to maintain incredible detail sharpness. Their streamlined platform makes uploading your custom artwork quick and simple. You can check out their dedicated ordering options directly. Browse their full collection of high-durability DTF transfers online. This collection provides reliable production solutions for independent clothing lines and commercial shops alike. Working with a professional supplier lets you focus your energy on marketing and creative design. It eliminates the stress of maintaining expensive machinery and dealing with clogged printheads. It keeps your apparel production workflow smooth, profitable, and efficient. Bring Your Custom Custom Apparel Designs to Life Stop risking your print quality with sub-par manufacturing. Upload your production-ready digital files to industry experts today and see the difference. Partner with Custom Print AZ and explore the professional DTF transfers collection now. Upload Your Designs Now
Learn more
DTF Transfer Pricing
DTF Transfer Pricing: The Ultimate 2026 Commercial Cost Guide Navigating the economics of apparel custom production requires careful budget planning. Printing costs affect your net profit margins directly. Choosing the right decoration method alters your financial success strategy. Modern commercial systems offer outstanding cost-to-benefit ratios. Direct-to-film technology has revolutionized small-batch manufacturing costs completely. It removes the steep setup fees associated with old-school methods. However, understanding general market pricing structures can feel confusing. This in-depth analysis breaks down print budgeting transparently. Pricing Guide Directory 1. Standard Commercial Pricing Models Explained 2. The Financial Logic of Buying Gang Sheets 3. Key Hidden Variables Influencing Total Price 4. Calculating Costs: In-House Production vs. Outsourcing 5. Why Extremely Low Prices Can Damage Profits 6. Practical Strategies to Lower Sourcing Costs 7. Sourcing Reliable Premium Transfer Films 1. Standard Commercial Pricing Models Explained Commercial suppliers typically balance pricing calculations using two main systems. They sell transfers either by individual image cutouts or by total roll length. Understanding these two systems prevents costly budgeting errors. Individual cut pricing calculates fees based on strict width and height measurements. This method serves small creators who need minimal logo quantities. The approach utilizes traditional square-inch math parameters common in the digital printing industry. Conversely, industrial scale operations prioritize continuous linear roll volume measurements. They sell space across fixed widths like twenty-two inches wide. You pay directly for the total running length utilized. Linear pricing lowers your overall unit cost dynamically as production increases. It rewards clean organization and tightly packed file formats. This is why growing garment brands scale using bulk film processing. 2. The Financial Logic of Buying Gang Sheets Gang sheets represent the ultimate method for cutting apparel decoration expenses. A gang sheet consolidates separate creative projects onto one production layout. This maximizes output while eliminating wasted margins. Suppliers offer massive tier discounts when you order longer continuous sheets. For example, a single five-foot sheet carries a standard base price rate. Buying a fifty-foot bulk roll slashes the per-foot cost drastically. Order Length Bracket Average Price Per Linear Foot Target Production Profile 1 to 5 Feet $6.50 – $8.50 Prototyping and custom gift projects 6 to 20 Feet $5.00 – $6.25 Small business apparel line launches 21 to 100 Feet $4.00 – $4.75 Corporate uniform fulfillment jobs 100+ Feet Bulk $3.25 – $3.85 Industrial merchandise scaling The financial math shows clear compounding advantages for busy print operators. Packing your files efficiently increases your total net profits on every shirt. It changes how you estimate custom project margins. 3. Key Hidden Variables Influencing Total Price Base material metrics are not the only things driving final customer invoice totals. File processing errors often generate unexpected manual service upcharges. Always ensure your design files adhere strictly to supplier guidelines. Artwork resolution affects system automated preflight checking significantly. Low-resolution images require extensive manual rebuilding by design technicians. Shops charge hourly graphics fees to fix blurry, unpressable files. Shipping logistics also affect real-world transfer prices heavily. Heavy film shipments require sturdy protective cardboard tubes to arrive safely. Choosing rush production delivery options can double your baseline transportation expenses. The Rush Processing Variable Standard order processing turnarounds span twenty-four to forty-eight production hours. Same-day emergency printing services usually add a thirty to fifty percent price premium. Planning production timelines early saves money. 4. Calculating Costs: In-House Production vs. Outsourcing Many business owners dream of buying commercial printers to control production. However, raw machinery purchase figures only represent part of the actual cost. You must calculate daily operational overhead accurately. Commercial printer setups demand constant workspace climate management. Running printhead maintenance routines daily consumes expensive specialty ink. If machines sit idle for weeks, precision printheads can clog permanently. Outsourcing transfers converts fixed machinery liabilities into clean, predictable variable costs. You pay exclusively for materials you intend to sell immediately. It removes the stress of equipment breakdowns entirely. 5. Why Extremely Low Prices Can Damage Profits The online printing marketplace features intense price competition among vendors. Ultra-low prices often signal compromised raw material ingredients. Cheap components yield brittle, substandard final products. Low-grade factories reduce costs by diluting white ink pigments. This creates thin ink deposits that allow shirt dyes to bleed through. Your bright white logos can turn a muddy gray after one laundry wash cycle. Poorly formulated adhesive powders fail to bond correctly with synthetic fabrics. The graphic can crack or peel off the shirt during standard washing. Replacing ruined customer garments destroys your target profit margins quickly. The Real Price of Client Claims Saving twenty dollars on a cheap film roll is not worth the risk. A single batch of peeling shirts can destroy your local business reputation completely. Prioritize certified premium materials for stable growth. 6. Practical Strategies to Lower Sourcing Costs You can optimize your sourcing workflow without sacrificing product quality. First, design your primary logo assets inside clean vector environments. Vector graphics simplify layout arrangements and fit together tightly. Second, combine multiple client orders onto a single long roll submission. Consolidating short jobs unlocks bulk tiered pricing brackets easily. This strategy allows you to pocket the cost difference as clean profit. Finally, establish an ongoing partnership with a dedicated premium supplier. Trusted suppliers offer loyalty rewards and consistent shipping rates. This reliability makes your business planning simple and predictable. 7. Sourcing Reliable Premium Transfer Films Finding a consistent, high-end production vendor is vital for your print shop. You need a partner that combines commercial-grade stability with transparent bulk pricing scales. We highly recommend assessing the digital production services at Custom Print AZ. They maintain advanced equipment arrays to ensure precise color registration. Their raw material sourcing satisfies rigorous wash durability standards. You can review their direct retail price frameworks seamlessly online. Explore their high-speed fulfillment solutions for DTF transfers. This commercial collection handles both small boutique projects and massive enterprise operations. Using an expert fulfillment house lets you scale your business safely. You can accept large orders confidently without worrying about machine limitations. It keeps your operational expenses clear and predictable. Optimize Your Apparel Production Budget Today Stop overpaying for low-yield separate cutouts. Switch to high-efficiency, commercial-grade gang rolls and maximize your true shop profitability. Partner with Custom Print AZ and explore the professional, budget-friendly DTF transfers collection now. View wholesale Roll Pricing
Learn more
Where To Buy DTF Transfers Near Me
Where To Buy DTF Transfers Near Me: Local vs. Online Sourcing Finding a reliable printing partner near you can transform your custom garment brand. Modern apparel businesses thrive on rapid production speed and exceptional fabric durability. When customer orders pile up, sourcing transfer films locally becomes a pressing question. Direct-to-film logistics involve balancing transit speed with total production volume. Many print shops look for immediate physical suppliers in their home cities. This detailed guide breaks down local search methods versus high-speed online ordering systems. Sourcing Guide Sections 1. How to Find Local DTF Print Providers Near You 2. Local Pickup vs. Online Delivery: A Detailed Comparison 3. Key Metrics to Evaluate a Nearby Print Shop 4. Understanding Transit Logistics and Same-Day Delivery 5. Technical Material Standards Required for Commercial Use 6. Smart Sourcing Strategies for Growing Brands 7. Sourcing Premium Commercial Transfers Online 1. How to Find Local DTF Print Providers Near You Tracking down nearby film suppliers requires utilizing modern digital business directories. Start by analyzing targeted map platforms using precise geographic keywords. Search phrases like custom commercial apparel printing yield excellent baseline local maps results. Local makerspaces and industrial commercial textile hubs often house advanced print setups. These spaces frequently lease out machinery time to independent graphic designers. Check local business listings for commercial printing shops that offer modern digital printing options. Regional apparel industry trade shows also serve as excellent networking events. Nearby vendors exhibit their production machinery capabilities at these conventions. Connecting directly with regional factory reps reveals hidden local manufacturing partners. Traditional screen printing businesses in your neighborhood are upgrading their facilities too. Many local companies now operate secondary digital film lines alongside their manual equipment. Call nearby textile printers directly to ask about their sheet outsourcing options. 2. Local Pickup vs. Online Delivery: A Detailed Comparison Choosing between walking into a local business or buying online involves clear trade-offs. Driving to a nearby shop eliminates standard parcel transit waiting times. This allows you to finish urgent, last-minute uniform jobs on the same afternoon. However, small regional print shops often run smaller desktop machines. These limited configurations can struggle to maintain color consistency across large wholesale runs. Online suppliers generally utilize large, industrial-grade roll printers for better volume output. Sourcing Parameter Nearby Local Print Shops Dedicated Online Manufacturers Transit Window Time Immediate same-day physical pickup available One to three business days shipping transit Machinery Setup Capacity Often limited to small desktop printers Industrial multi-head roll printers running constantly Bulk Tier Discounting Higher material baseline costs per square inch Aggressive volume discounts on long gang sheets Quality Management Varies widely depending on local conditions Strict climate control guarantees consistency Online manufacturers optimize their supply chains to buy raw materials at a massive scale. This wholesale advantage allows them to offer lower base prices than small local storefronts. It balancing out the cost of standard express delivery services. 3. Key Metrics to Evaluate a Nearby Print Shop Never buy an expensive roll of film based on location convenience alone. Substandard transfer materials will compromise your finished garment quality. Bring a test graphic file to check the local printer's equipment alignment. Inspect the density of the white ink layer under bright light. The white backing must completely block the garment color underneath. If the backing is thin, dark fabric dyes will bleed through your graphics after heat pressing. Ask about the exact curing brand components they use daily. High-quality shops use premium inks that stay flexible when stretched on elastic clothing. Cheap raw materials feel stiff, plasticky, and crack during standard laundry cycles. The Importance of a Sample Press Test Always press a sample design onto a scrap shirt before committing to large jobs. Stretch the cooled print firmly in multiple directions to check its durability. A premium transfer should stretch smoothly and snap back without tearing. 4. Understanding Transit Logistics and Same-Day Delivery If you choose an online vendor, look closely at their shipping hub locations. Centralized manufacturing centers process and ship custom orders remarkably fast. Many major suppliers offer overnight shipping options for time-sensitive projects. Ensure your chosen vendor uses heavy, durable cardboard packaging tubes. Thin mailer envelopes can bend or crease your delicate films during shipping. A deep crease can cause printheads to strike the film or create uneven pressure lines. Track local weather patterns when ordering high volumes during seasonal extremes. High humidity levels can affect curing powders if the packaging is damaged. Top-tier suppliers use sealed plastic bags to protect films from moisture during transit. 5. Technical Material Standards Required for Commercial Use Commercial clients expect their custom branded shirts to survive dozens of washes. Meeting this expectation requires sourcing transfers made with premium PET plastic sheets. These professional sheets release smoothly without leaving sticky ink residue behind. The type of hot-melt adhesive powder used affects the final texture significantly. Ultra-fine TPU powders create a soft, lightweight feel on lightweight shirts. Coarser adhesive powders work better for thick heavy fabrics like canvas bags or denim jackets. Verify that your supplier uses commercial RIP software for color matching. This specialized software translates digital screen colors into physical ink droplets accurately. It ensures your client's official brand colors stay perfectly consistent over time. 6. Smart Sourcing Strategies for Growing Brands Successful apparel brands often combine local and online sourcing methods. Use nearby local printers for fast prototyping and quick sample test sheets. This allows you to show physical samples to clients within hours of a meeting. Once your client approves the design, move the main order to a large online manufacturer. This allows you to take advantage of bulk volume tier pricing on long gang sheets. This combined workflow protects your profit margins while keeping your business agile. Keep a digital library of your frequently used branding logos organized. Grouping recurring jobs onto a single long roll order saves setup time. It helps you unlock the lowest possible cost per print from your supplier. 7. Sourcing Premium Commercial Transfers Online When local shops cannot meet your production capacity, find a reliable online manufacturing partner. Look for a vendor that delivers consistent commercial quality with fast turnaround times. We highly suggest exploring the high-resolution printing services at Custom Print AZ. They use state-of-the-art print equipment to ensure sharp details and excellent color depth. Their streamlined online platform makes uploading your custom artwork fast and simple. You can browse their specialized product categories directly from your shop. Explore their commercial collection of high-durability DTF transfers online. This flexible system handles small custom boutique orders and high-volume commercial runs with equal precision. Partnering with a dedicated manufacturing house helps your apparel business grow safely. It eliminates the high cost of buying machinery and dealing with daily printhead maintenance. It keeps your custom apparel workflow smooth, fast, and highly profitable. Get Reliable Commercial Quality Delivered To Your Shop Stop dealing with unpredictable local print shops and slow turnaround times. Upgrade your custom apparel business with durable, bright, and vibrant gang rolls today. Partner with Custom Print AZ and view the professional DTF transfers collection now. Shop Premium Transfers Now
Learn more
Mastering DTF Printing
Mastering DTF Printing requires more than sending artwork to a printer and applying the finished transfer to a shirt. Consistent results depend on artwork preparation, color management, film quality, adhesive coverage, curing, heat press settings, garment selection, and quality control. When these elements work together, Direct to Film printing can produce bright colors, fine details, smooth gradients, and durable designs on a wide variety of fabrics. This guide explains the complete DTF workflow for apparel businesses, print shops, clothing brands, event organizers, and independent creators. You will learn how to prepare artwork, build efficient gang sheets, choose transfer sizes, avoid common production mistakes, and improve pressing consistency. Whether you produce transfers in-house or order ready-to-press designs, understanding each stage helps reduce waste and deliver more professional results. What Is DTF Printing? DTF stands for Direct to Film. In this process, a digital design is printed onto a coated film, covered with adhesive powder, cured, and then transferred to a garment using controlled heat and pressure. The process supports full-color artwork, white ink, gradients, small details, and complex designs that may be difficult to produce with traditional vinyl cutting. DTF is part of the broader development of digital textile printing, which uses digital technology to place designs onto fabrics and textile-related surfaces. Unlike methods that work best with one fabric category, DTF transfers can be applied to cotton, polyester, blends, canvas, and many other compatible materials. Businesses that prefer professionally produced transfers can explore custom printing options through Custom Print AZ. Ordering ready-to-press transfers allows decorators to focus on garment preparation, placement, pressing, packaging, and customer fulfillment. Why Mastering DTF Printing Matters The DTF process may look simple, but minor mistakes can affect the final product. A transfer can appear perfect before pressing and still fail because of moisture, uneven pressure, incorrect peeling, excessive heat, or poor garment preparation. Mastering DTF Printing helps businesses improve: Color consistency across repeat orders Transfer durability after washing Fine-line and small-text reproduction Production speed and order capacity Material usage and gang sheet efficiency Garment placement and visual balance Customer satisfaction and repeat purchases A reliable workflow also makes troubleshooting easier. When every stage is documented, operators can identify whether a problem came from artwork, printing, powder application, curing, pressing, or garment care. Start With High-Quality Artwork Professional DTF results begin with properly prepared artwork. Low-resolution images, unwanted backgrounds, compressed files, and extremely thin details can reduce print quality before the design reaches the film. Use the Correct Resolution Artwork should generally be prepared at 300 DPI at the final printing size. Increasing the resolution of a small, blurry image does not restore lost detail. Whenever possible, begin with a high-resolution PNG, PSD, PDF, AI, EPS, or another suitable production file. Use a Transparent Background For designs that should not include a rectangular background, use a transparent file. A PNG with transparency is commonly used for raster artwork. Check the edges carefully for white halos, leftover pixels, or unwanted background fragments. Check Small Text and Fine Lines Very thin lines and tiny text may not print or press as expected. Fine details should be tested at their actual production size. A design that looks clear when enlarged on a computer screen may become difficult to read on a small chest print. Confirm the Final Dimensions Always prepare artwork at the intended print dimensions. Resizing during production can change text readability, line thickness, and visual balance. Customers who know the required dimensions can order DTF transfers by size for consistent placement across different garment categories. Understanding White Ink and Underbase Quality White ink plays a critical role in DTF printing because it creates the foundation beneath the color layer. On dark garments, this underbase keeps colors bright and prevents the fabric from showing through the artwork. An underbase that is too light may produce dull colors. An excessive white layer can make the transfer feel heavy or stiff. The goal is balanced opacity that supports the design without adding unnecessary thickness. White ink must also remain properly mixed and circulated in production systems. Sedimentation can cause inconsistent coverage, clogged printheads, or uneven white areas. Print shops producing their own transfers should follow the printer and ink manufacturer’s maintenance recommendations. Building Efficient Gang Sheets A gang sheet places multiple designs on one larger transfer sheet or roll section. This allows businesses to use film more efficiently and organize several logos, names, sleeve prints, tags, and full-size graphics in one production file. A well-organized gang sheet can reduce transfer cost per design, improve order preparation, and simplify repeat production. However, designs must be spaced correctly so they can be cut apart without damaging nearby artwork. Best Practices for Gang Sheet Layouts Leave enough cutting space between each design Keep artwork at its final print dimensions Remove unnecessary transparent space Group similar order sizes together Check every design for resolution and background issues Confirm that no artwork overlaps another design Use available sheet space without crowding the layout The DTF gang sheet builder allows users to arrange multiple graphics within a defined print area. This is useful for apparel brands, teams, schools, event orders, and businesses producing several garment placements at once. Production tip: Before submitting a gang sheet, zoom in and inspect every design. One low-resolution logo or unwanted background can affect the value of the entire sheet. Choosing the Right DTF Transfer Size Correct sizing is essential for visual balance. A design that is too small may look lost on the garment, while an oversized transfer can feel uncomfortable or extend too close to seams and edges. Placement Common Starting Size Recommended Use Left Chest 3–4 inches wide Logos, staff uniforms, brand marks Adult Front 10–12 inches wide T-shirts, sweatshirts, promotional apparel Adult Back 11–13 inches wide Large logos, event designs, team graphics Youth Front 7–9 inches wide Children’s shirts and school apparel Sleeve 2–4 inches wide Small logos, flags, names, sponsor marks Neck Label 2–3 inches wide Brand labels and garment information These measurements are starting points rather than strict rules. Garment size, artwork shape, customer preference, and intended placement should all be considered. A tall vertical design and a wide horizontal logo may require different dimensions even when used in the same location. Film, Powder, and Curing Fundamentals Consistent DTF production depends on compatibility between the film, ink, adhesive powder, printer settings, and curing method. Materials should not be selected only by price. Poor compatibility can lead to uneven powder coverage, dull color, weak adhesion, oily surfaces, or difficult peeling. Film Quality The coated film must accept the printed ink cleanly and release the finished design according to its intended peel method. Some films are designed for hot peel, warm peel, cold peel, or multi-peel application. Operators should never assume the peel method based only on the appearance of the carrier. Adhesive Powder Coverage Adhesive powder must cover the complete wet ink layer. Missing powder can create weak sections, while excessive residue around the artwork may leave unwanted adhesive marks after pressing. After powder application, remove loose material carefully. The goal is an even adhesive layer attached only to the printed areas. Proper Curing Curing melts and stabilizes the adhesive powder before the transfer is applied to a garment. Undercured powder may remain grainy or fail to bond correctly. Overcuring can change the adhesive behavior, affect color, or make the transfer more difficult to press. The correct curing temperature and time depend on the materials and equipment. Follow the product manufacturer’s instructions rather than applying one universal curing setting to every film and powder combination. Preparing the Garment for Pressing Garment preparation is one of the most overlooked parts of Mastering DTF Printing. Even a perfectly produced transfer may fail when applied to a damp, wrinkled, coated, or uneven surface. Inspect the Fabric Check the garment composition and care label. Cotton, polyester, blends, nylon, performance fabric, and coated materials can react differently to heat. Test unfamiliar garments before pressing a completed customer order. Pre-Press the Garment Pre-pressing for approximately two to five seconds removes surface moisture and wrinkles. This creates a smoother area for transfer placement. Avoid over-preheating heat-sensitive polyester because prolonged exposure can increase the risk of shine or dye migration. Avoid Seams and Obstructions Collars, pockets, seams, zippers, buttons, and drawstrings can interfere with pressure. Use a pressing pillow or pad to raise the application area when necessary. The upper platen should contact the complete transfer evenly. Recommended Heat Press Starting Points Heat press settings vary by transfer and garment. The transfer supplier’s instructions should always take priority. The following table provides general starting ranges for testing. Fabric Temperature Time Pressure 100% Cotton 300–320°F 10–15 seconds Medium Cotton-Polyester Blend 285–310°F 10–15 seconds Medium 100% Polyester 270–290°F 8–12 seconds Light to medium Performance Fabric 265–285°F 8–12 seconds Light to medium Hoodies 300–320°F 12–15 seconds Medium to firm Use these ranges only as a testing guide. Film type, adhesive, garment coating, machine accuracy, and peel instructions can all change the final settings. Hot Peel, Warm Peel, and Cold Peel The peel method determines when the carrier film should be removed after pressing. Hot Peel Hot-peel transfers are removed immediately or shortly after the press opens. They support fast production, but the film should be peeled smoothly and consistently. Warm Peel Warm-peel transfers rest for a few seconds before removal. This short cooling period can help stabilize the design while maintaining an efficient workflow. Cold Peel Cold-peel transfers must cool before the carrier is removed. Peeling too early may lift part of the design. Follow the exact instructions supplied with the transfer rather than guessing based on previous products. Why the Finishing Press Is Important After the carrier film is removed, cover the design with parchment paper, kraft paper, or an approved finishing sheet. Press again for approximately five to ten seconds or according to the supplier’s directions. The finishing press can improve: Edge adhesion Surface texture Wash durability Flexibility Overall appearance Different cover sheets can produce different finishes. A smooth sheet may create more shine, while a textured sheet can produce a more natural fabric-like appearance. Test finishing materials before using them on a full order. Common DTF Printing Problems Edges Lift After Pressing Lifting edges may indicate insufficient heat, pressure, or pressing time. Moisture and uneven platen contact can also cause weak adhesion. Pre-press the garment and check whether seams are preventing complete pressure. Part of the Design Stays on the Film This problem can happen when the film is peeled too early, the transfer is under-pressed, or pressure is uneven. Return the film to its original position and repress briefly before trying again. Colors Look Dull Dull colors may result from weak white ink coverage, incorrect artwork settings, low-quality materials, insufficient curing, or excessive heat. Compare the artwork, printed film, and pressed result to identify the stage where the color changed. White Areas Change Color This is often dye migration from polyester fabric. Lower the pressing temperature and time, test the garment, and use transfers suitable for dye-sensitive materials. The Transfer Feels Too Thick A heavy feel may come from excessive white ink, too much adhesive, oversized solid artwork, or an unsuitable finishing process. Artwork with large solid backgrounds will naturally feel heavier than separated design elements. The Print Cracks After Washing Cracking may be caused by incomplete adhesion, overcuring, excessive heat, poor material compatibility, or incorrect garment care. Review the full workflow instead of changing only the press temperature. Creating a Reliable Quality-Control Process Quality control is essential for Mastering DTF Printing. Every production batch should be checked before transfers are shipped or applied to customer garments. A practical inspection should include: Confirming artwork dimensions and orientation Checking colors and white underbase coverage Inspecting powder distribution Looking for scratches, pinholes, or missing details Verifying the correct peel method Testing adhesion on a sample garment Stretching the design after cooling Completing wash tests for new materials Keep a production log for transfer type, garment composition, temperature, time, pressure, peel method, finishing press, and results. Documenting successful combinations reduces guesswork on repeat orders. Improving Production Efficiency Efficient production does not mean rushing every stage. It means organizing the workflow so operators can complete orders consistently with less waste and fewer corrections. Standardize Artwork Review Use a checklist for resolution, dimensions, transparency, spelling, colors, and design placement. Catching problems before printing is faster and less expensive than reprinting a full gang sheet. Group Similar Orders Press garments with similar materials and settings together. This reduces repeated temperature and pressure adjustments and lowers the chance of applying cotton settings to polyester garments. Label Transfers Clearly Mark each transfer with the order name, size, placement, garment type, and pressing instructions when appropriate. Clear organization is especially important when multiple team members share production responsibilities. Maintain the Heat Press Check platen temperature accuracy, pressure consistency, pad condition, and machine cleanliness. An inaccurate or uneven press can create repeated failures even when the transfer itself is correct. DTF Transfer Care Instructions Allow the finished garment to cool before folding or packaging. Waiting approximately 24 hours before the first wash gives the adhesive bond time to stabilize. Recommended customer care instructions include: Turn the garment inside out before washing Use cold or warm water Choose a mild detergent Avoid bleach and harsh chemicals Use low-temperature drying or air dry Do not iron directly over the design Clear care instructions help customers protect the garment and reduce avoidable complaints related to high-temperature washing, aggressive drying, or direct ironing. Final Thoughts on Mastering DTF Printing Mastering DTF Printing is a combination of technical knowledge, reliable materials, accurate artwork, controlled pressing, and repeatable quality checks. Strong results begin before the transfer reaches the heat press. File preparation, gang sheet layout, sizing, film, powder, curing, and garment selection all influence the final product. Start with tested settings, follow the supplied application instructions, and adjust one variable at a time. Record successful results for each garment and transfer combination. This approach helps print businesses reduce waste, protect profit margins, and deliver consistent apparel across small custom orders and larger production runs. For custom transfer services, visit Custom Print AZ. You can also organize multiple designs with the DTF gang sheet builder or order DTF transfers by size for specific apparel placements. Frequently Asked Questions What is the most important step in mastering DTF printing? Consistent quality control is the most important step. Artwork, transfer materials, curing, garment preparation, and pressing conditions must all be checked because a problem at any stage can affect the finished product. What file type is best for DTF printing? A high-resolution PNG with a transparent background is commonly used for raster artwork. Vector formats such as AI, EPS, or PDF can also work well when they are prepared correctly. Files should generally be created at 300 DPI and final print size. Can DTF transfers be applied to cotton and polyester? Yes. DTF transfers can be applied to cotton, polyester, blends, and many other compatible fabrics. Polyester usually requires lower heat and shorter pressing times to reduce dye migration and press marks. What is a DTF gang sheet? A DTF gang sheet combines several designs on one larger print area. It helps reduce unused film, organize multiple transfers, and lower the production cost per design. How much space should be left between gang sheet designs? Leave enough room to cut each design without damaging nearby artwork. The exact spacing depends on the cutting method, but clear separation should remain around every graphic. Why should a garment be pre-pressed? Pre-pressing removes moisture and wrinkles from the application area. This creates a flatter surface and helps the adhesive bond more evenly with the garment. Why is my DTF transfer lifting? Lifting may be caused by insufficient temperature, pressure, or pressing time. Moisture, uneven platen contact, incorrect peeling, and incompatible fabric coatings can also contribute to the problem. Does every DTF transfer use the same heat settings? No. Settings vary according to film, powder, ink, garment material, and transfer manufacturer. Always follow the instructions supplied with the transfer and test unfamiliar fabrics. Is a finishing press necessary? A finishing press is strongly recommended because it can improve edge adhesion, texture, flexibility, and wash durability. Use a suitable cover sheet and follow the recommended finishing time. How long should customers wait before washing a DTF-printed garment? Waiting approximately 24 hours before the first wash is generally recommended. The garment should be washed inside out with mild detergent and dried using low heat or air drying.
Learn more
Top Trends in Custom Printing
Top Trends in Custom Printing: How to Personalize Your Products Effectively The garment decoration landscape is undergoing a massive paradigm shift. Consumers no longer accept basic, mass-produced clothing items. Modern buyers demand highly unique garments that reflect their personal values. This cultural shift forces custom apparel brands to adjust quickly. Staying ahead of production changes requires adopting flexible manufacturing strategies. Modern digital workflows allow creators to print highly complex designs effortlessly. By embracing new machine systems, companies avoid expensive inventory overhead. This complete guide analyzes the top trends driving custom printing today. Master Guide Table of Contents 1. The Unstoppable Rise of On-Demand Custom Personalization 2. Direct-to-Film Transfers: Redefining Multi-Fabric Application 3. Eco-Friendly Inks and Sustainable Apparel Production Logistics 4. Bold Color Maximalism and Complex High-Resolution Artworks 5. Integrating Print Workflows Effectively into Modern E-commerce 6. Comprehensive Substrate Matrix for Retail-Ready Finishes 7. Sourcing Elite Commercial Transfers for Seamless Business Scaling 1. The Unstoppable Rise of On-Demand Custom Personalization Bulk printing models are rapidly disappearing from the modern fashion market. Storing thousands of identical pre-printed shirts creates massive financial waste. If styles change unexpectedly, businesses are left with unsold product stock. On-demand manufacturing resolves this inventory problem completely. Brands now wait to print designs until a customer places an order. This strategy keeps corporate capital liquid and protects baseline profit margins. Personalization increases consumer engagement and builds strong brand loyalty. Buyers naturally value custom-made clothing much higher than generic store products. To learn more about this global retail evolution, explore the history of mass customization on Wikipedia. 2. Direct-to-Film Transfers: Redefining Multi-Fabric Application Direct-to-film machinery is completely transforming traditional textile production methods. Older digital systems like direct-to-garment require complex, wet chemical pretreatments. Furthermore, those older systems restrict your decoration options to natural cotton fabrics. Film systems resolve these material limitations by utilizing specialized PET sheets. The artwork is printed onto a transparent film carrier sheet first. The machine applies vibrant colored inks before adding a clean white background layer. An automated mechanism then applies a dry adhesive powder to the print. Passing through a curing tunnel melts this powder into a strong bond. This allows the finished transfer to fuse perfectly with almost any fabric type. The Core Advantage of Film Technology Film transfers bond beautifully to cotton, polyester, nylon, and heavy canvas. This flexibility allows apparel brands to scale catalogs without buying different machines. You can decorate hoodies, activewear, and bags using the exact same transfer sheets. 3. Eco-Friendly Inks and Sustainable Apparel Production Logistics Modern consumers actively look for sustainable fashion options when shopping online. Traditional printing methods often rely on harsh chemicals that generate toxic waste. Moving toward water-based ink choices reduces environmental impact significantly. Water-based digital inks provide vivid color execution without compromising environmental health. These modern formulations do not contain dangerous heavy metals or toxic solvents. As a result, garments remain safe for sensitive skin and children's apparel lines. Additionally, digital on-demand printing cuts physical fabric waste down to zero. You only use power and materials when an active purchase occurs. This clean manufacturing methodology helps your brand meet modern sustainability standards easily. 4. Bold Color Maximalism and Complex High-Resolution Artworks Minimalist, single-color logos are no longer dominating the streetwear market. Today's popular trends emphasize bright maximalism, complex shading, and photographic artwork. Achieving these looks requires exceptional print resolution and color accuracy. Traditional screen printing cannot reproduce intricate gradients without expensive, complex setups. Digital systems build complex colors easily by mixing cyan, magenta, yellow, and black. This approach captures every subtle tone and fine shadow lines flawlessly. Ensure your digital design files utilize a crisp resolution of 300 DPI minimum. High-resolution design assets guarantee sharp details on finished products. This careful preparation prevents blurry edges and keeps your clothing looking professional. Trend Alert: Vibrant Neon Highlights Modern apparel lines are heavily incorporating bright neon and reflective accents. High-grade digital systems can replicate these intense color spaces accurately. Using bright tones helps custom apparel stand out in competitive online markets. 5. Integrating Print Workflows Effectively into Modern E-commerce Personalizing your products effectively requires building an automated online ordering pipeline. Manual order entry slows down shipping speeds and introduces costly processing mistakes. Your digital store should connect directly with your manufacturing software. When a customer uploads custom artwork, the file enters production automatically. This setup cuts down on manual art checks and speeds up fulfillment. Fast processing keeps your customers happy and encourages repeat business. Using digital gang sheets simplifies your fulfillment process even further. You can pack multiple customer orders tightly onto a single film roll. This high-density layout minimizes material waste and drops production costs dramatically. 6. Comprehensive Substrate Matrix for Retail-Ready Finishes Every fabric style reacts differently to heat press temperature and pressure settings. To personalize your items effectively, you must understand these material differences. Let us analyze the ideal production settings for popular retail substrates. Fabric Material Ideal Printing Approach Application Temperature Required Press Time 100% Combed Cotton Direct-to-Film Transfers 300°F (Medium Pressure) 12 to 15 Seconds Athletic Polyester Low-Temp Film Sheets 275°F (Firm Pressure) 10 to 12 Seconds Heavy Canvas Bags Industrial Film Rolls 320°F (Heavy Pressure) 15 Seconds Total Nylon Windbreakers Specialty Adhesive Film 265°F (Light Pressure) 8 to 10 Seconds Controlling these production variables protects your delicate fabrics from heat damage. Always test print on scrap material before starting a large production run. This habit keeps your quality consistent and prevents costly mistakes. 7. Sourcing Elite Commercial Transfers for Seamless Business Scaling Building a successful custom printing brand requires a reliable production partner. Sourcing from an elite print house ensures beautiful colors and exceptional wash durability. Look for a team that utilizes industrial-grade equipment for every single run. We highly suggest working with the digital garment specialists at Custom Print AZ. Their advanced production hub maintains strict quality benchmarks for every order. They make uploading your custom artwork files simple, straightforward, and fast. You can browse their specialized print options directly from your browser. Explore their commercial catalog of high-durability DTF transfers online. This flexible system handles small custom family projects and large corporate apparel runs with equal precision. Partnering with an industry leader streamlines your apparel manufacturing workflow perfectly. It eliminates the high cost of buying machinery and dealing with daily printhead maintenance. It leaves you free to focus entirely on building your custom apparel brand and connecting with your audience. Supercharge Your Apparel Brand Production Effectively Stop wasting valuable time and capital on restrictive printing methods that crack and fade. Switch to universal, high-efficiency custom gang sheets and decorate any fabric style with confidence today. Partner with Custom Print AZ and view the professional DTF transfers collection now. Order Your Custom Transfers Now
Learn more
How Custom Prints Can Enhance Brand Visibility and Recognition
How Custom Prints Can Enhance Brand Visibility and Recognition Building strong brand visibility is a major challenge in the modern crowded marketplace. Traditional digital ads are becoming increasingly expensive and easy for consumers to ignore online. Because of this, successful businesses are focusing heavily on real-world physical marketing strategies. Custom prints offer a highly tangible and lasting way to capture customer attention today. Using decorated merchandise turns everyday apparel items into active, moving billboards for your business. Every custom shirt, hoodie, or bag expands your organic brand reach significantly. To achieve great results, you must choose durable printing techniques that look sharp over time. This detailed guide explores how high-quality custom prints can maximize your market recognition. Brand Visibility Directory 1. The Core Psychology of Brand Recognition and Visual Assets 2. Transforming Premium Custom Apparel into Walking Mobile Billboards 3. Comparing Commercial Print Methods for Maximum Visual Clarity 4. Preparing Crisp Vector Graphics for Consistent Brand Reproduction 5. Leveraging Direct-to-Film Transfers for High-Volume Corporate Marketing 6. Matching Corporate Branding Assets to the Perfect Fabric Bases 7. Sourcing Elite Commercial Transfers to Scale Brand Visibility 1. The Core Psychology of Brand Recognition and Visual Assets Brand recognition depends heavily on consistent visual exposure over extended periods of time. Consumers need to encounter your logo multiple times before they fully trust your business. Physical merchandise provides this constant, subtle exposure more effectively than temporary digital banner ads. When people interact with high-quality physical products, they form positive brand associations automatically. A premium texture or clean print design communicates corporate professionalism and high attention to detail. This physical touch builds deeper customer relationships that digital marketing channels simply cannot replicate. To design an effective branding campaign, you must keep your visual assets highly standardized. Your corporate logos, slogans, and color palettes should look exactly the same across all products. You can learn more about the strategic development of global brand management workflows on Wikipedia. 2. Transforming Premium Custom Apparel into Walking Mobile Billboards Custom-printed apparel acts as a continuous, organic advertising tool for your growing business. When employees or loyal customers wear your branded shirts out in public, they share your logo. This real-world exposure introduces your corporate identity to new potential clients every day. This organic form of marketing carries a high level of social proof and trust. People naturally trust brands that are actively recommended or worn by real people in their community. This subtle endorsement makes custom merchandise far more credible than standard paid online promotions. Additionally, giving away printed apparel at corporate events builds strong team unity and excitement. It connects your workers to your brand mission while turning them into proud company ambassadors. This dual benefit makes custom printing an incredibly smart investment for modern organizations. 3. Comparing Commercial Print Methods for Maximum Visual Clarity Choosing the wrong garment printing technique can result in faded colors and cracked logos. Poor print quality directly harms your professional brand reputation and wastes marketing capital. Let us carefully analyze the primary commercial garment decoration techniques available today. Traditional screen printing yields thick ink layers but requires high upfront setup fees. Operators must create separate physical stencils for every single color used in your corporate logo. This intensive setup makes short promotional print runs highly expensive for small businesses. Direct-to-garment digital machines offer fast processing but limit your material decoration options. These systems require applying chemical pretreatments and work well only on 100% natural cotton fabrics. They struggle to deliver bright, vibrant colors on synthetic polyester sports jackets. 4. Preparing Crisp Vector Graphics for Consistent Brand Reproduction The final physical clarity of your custom prints depends entirely on your digital file preparation. Using low-resolution web images will result in fuzzy, pixelated edges on your finished clothes. Your creative design files must use a sharp resolution of 300 DPI minimum. Always remove solid background blocks from your design layers before exporting your project files. Faint, uncleaned background pixels will print as noticeable shapes on your dark garments. Use hard masking tools to ensure your design canvas is perfectly transparent. Maintain a minimum line thickness of 0.02 inches for all fine graphics and font lines. If a design element is too thin, it cannot hold enough adhesive powder during production. This lack of adhesive causes delicate details to peel away during standard wash cycles. Avoid Overlapping Vector Layouts Never let the invisible boundary frames of your graphics overlap on your final gang sheet. Overlapping elements can cause errors in automated print queue software. Give every company logo its own clear physical space. 5. Leveraging Direct-to-Film Transfers for High-Volume Corporate Marketing Direct-to-film printing represents a massive technical leap forward for promotional product marketing. This digital system prints high-resolution graphics onto specialized PET plastic sheets first. An automated machine then applies a uniform layer of hot-melt adhesive powder to the ink. This advanced technique allows you to pack multiple unique client designs onto a single film roll. You can easily combine pocket logos, sleeve accents, and large back graphics together. This high-density layout approach eliminates material waste and drops production costs significantly. The Efficiency of On-Demand Branding Using digital film sheets allows your company to manage marketing items with zero pre-printed inventory waste. You order custom transfers in advance and store them safely in compact flat boxes. You heat-press the graphics onto blank garments only as needed. 6. Matching Corporate Branding Assets to the Perfect Fabric Bases Different apparel materials require specific print handling to ensure long-lasting durability. To maximize your brand visibility, you must match your graphics to the right fabric substrates. Let us look at how common promotional clothing materials behave during production. Promotional Item Base Recommended Printing Method Primary Finish Challenge Premium Combed Cotton Tees Direct-to-Garment / Film Transfers Surface fibers lifting through thin ink layers Polyester Athletic Jerseys Dye Sublimation / Film Sheets Dye migration changing light logo colors Heavy Canvas Event Totes Industrial Film Transfer Sheets Thick seams interfering with flat press plates Nylon Corporate Windbreakers Low-Temperature Specialty Films Waterproof coatings rejecting adhesive bonds Analyze your target audience carefully before selecting your promotional product materials. Choosing a universal printing technique allows you to decorate different clothing items consistently. This uniformity keeps your corporate branding clean, sharp, and highly professional. 7. Sourcing Elite Commercial Transfers to Scale Brand Visibility Executing a successful corporate branding campaign requires a highly reliable production partner. Sourcing from a premier print house ensures beautiful colors and exceptional wash durability. Look for a team that utilizes industrial-grade systems for every single run. We highly suggest working with the digital garment specialists at Custom Print AZ. Their advanced production hub maintains strict quality benchmarks for every order. They make uploading your custom artwork files simple, straightforward, and fast. You can browse their specialized print options directly from your browser. Explore their commercial catalog of high-durability DTF transfers online. This flexible system handles small custom family projects and large corporate apparel runs with equal precision. Partnering with an industry leader streamlines your apparel manufacturing workflow perfectly. It eliminates the high cost of buying machinery and dealing with daily printhead maintenance. It leaves you free to focus entirely on building your custom apparel brand and connecting with your audience. Enhance Your Corporate Brand Recognition Effortlessly Stop risking your business image with low-grade prints that crack, peel, and fade after a few washes. Switch to premium, production-ready custom gang sheets and decorate any apparel style with confidence today. Partner with Custom Print AZ and explore the commercial DTF transfers collection now. Order Your Custom Transfers Now
Learn more