

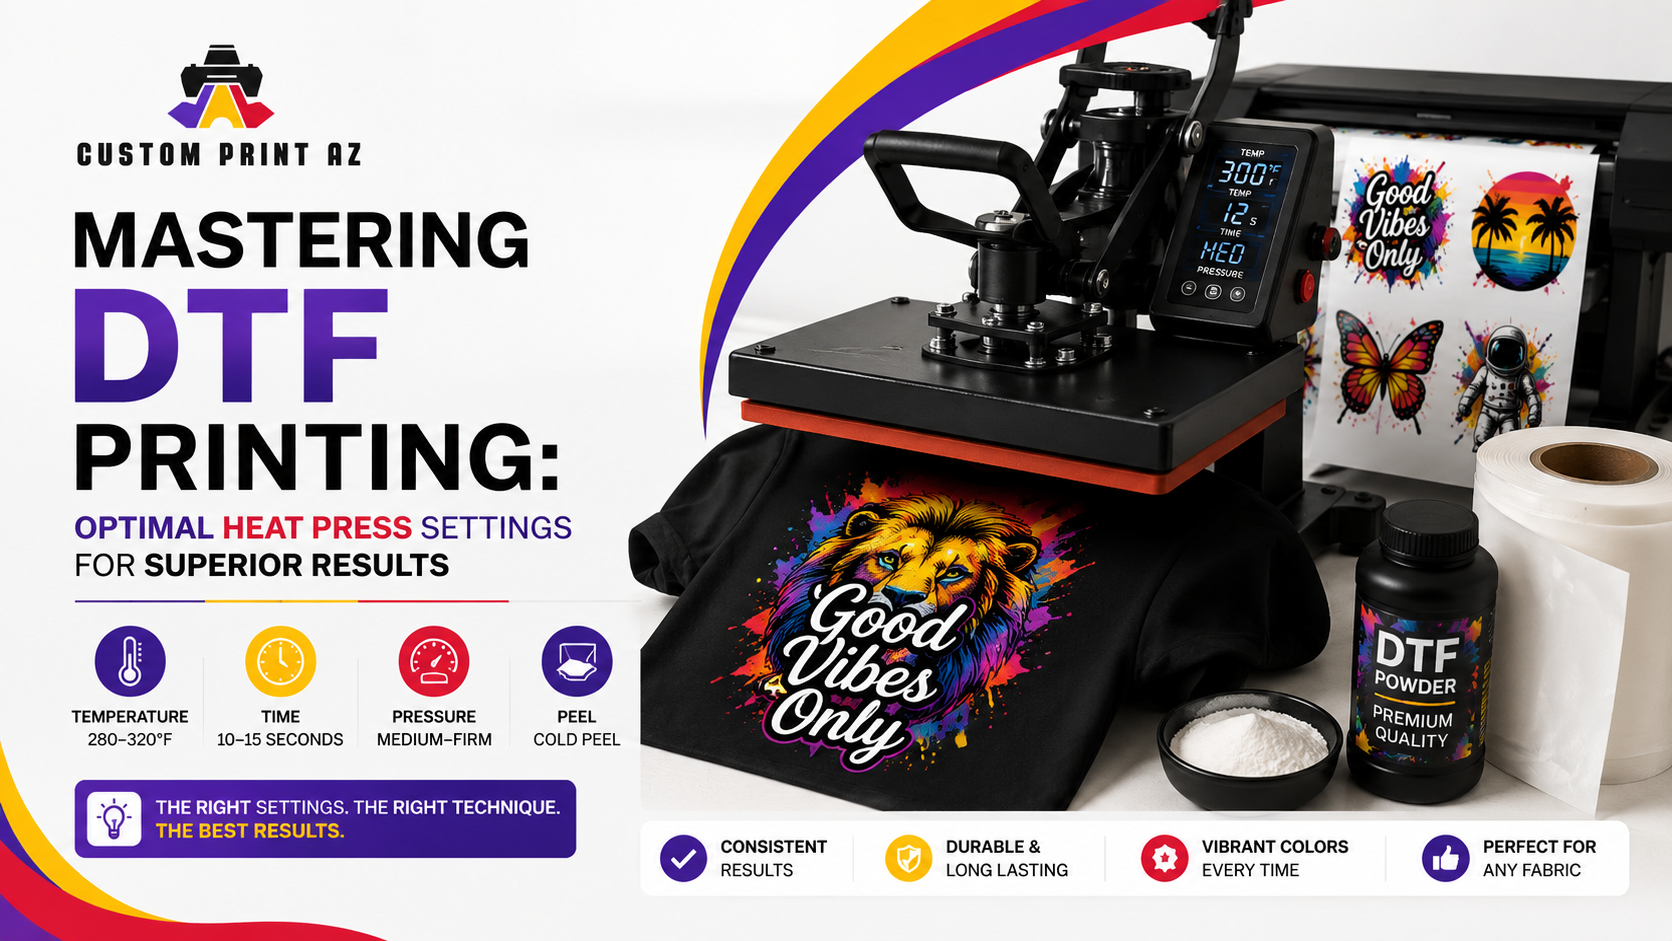
Mastering DTF Printing requires more than sending artwork to a printer and applying the finished transfer to a shirt. Consistent results depend on artwork preparation, color management, film quality, adhesive coverage, curing, heat press settings, garment selection, and quality control. When these elements work together, Direct to Film printing can produce bright colors, fine details, smooth gradients, and durable designs on a wide variety of fabrics.
This guide explains the complete DTF workflow for apparel businesses, print shops, clothing brands, event organizers, and independent creators. You will learn how to prepare artwork, build efficient gang sheets, choose transfer sizes, avoid common production mistakes, and improve pressing consistency. Whether you produce transfers in-house or order ready-to-press designs, understanding each stage helps reduce waste and deliver more professional results.
What Is DTF Printing?
DTF stands for Direct to Film. In this process, a digital design is printed onto a coated film, covered with adhesive powder, cured, and then transferred to a garment using controlled heat and pressure. The process supports full-color artwork, white ink, gradients, small details, and complex designs that may be difficult to produce with traditional vinyl cutting.
DTF is part of the broader development of digital textile printing, which uses digital technology to place designs onto fabrics and textile-related surfaces. Unlike methods that work best with one fabric category, DTF transfers can be applied to cotton, polyester, blends, canvas, and many other compatible materials.
Businesses that prefer professionally produced transfers can explore custom printing options through Custom Print AZ. Ordering ready-to-press transfers allows decorators to focus on garment preparation, placement, pressing, packaging, and customer fulfillment.
Why Mastering DTF Printing Matters
The DTF process may look simple, but minor mistakes can affect the final product. A transfer can appear perfect before pressing and still fail because of moisture, uneven pressure, incorrect peeling, excessive heat, or poor garment preparation.
Mastering DTF Printing helps businesses improve:
- Color consistency across repeat orders
- Transfer durability after washing
- Fine-line and small-text reproduction
- Production speed and order capacity
- Material usage and gang sheet efficiency
- Garment placement and visual balance
- Customer satisfaction and repeat purchases
A reliable workflow also makes troubleshooting easier. When every stage is documented, operators can identify whether a problem came from artwork, printing, powder application, curing, pressing, or garment care.
Start With High-Quality Artwork
Professional DTF results begin with properly prepared artwork. Low-resolution images, unwanted backgrounds, compressed files, and extremely thin details can reduce print quality before the design reaches the film.
Use the Correct Resolution
Artwork should generally be prepared at 300 DPI at the final printing size. Increasing the resolution of a small, blurry image does not restore lost detail. Whenever possible, begin with a high-resolution PNG, PSD, PDF, AI, EPS, or another suitable production file.
Use a Transparent Background
For designs that should not include a rectangular background, use a transparent file. A PNG with transparency is commonly used for raster artwork. Check the edges carefully for white halos, leftover pixels, or unwanted background fragments.
Check Small Text and Fine Lines
Very thin lines and tiny text may not print or press as expected. Fine details should be tested at their actual production size. A design that looks clear when enlarged on a computer screen may become difficult to read on a small chest print.
Confirm the Final Dimensions
Always prepare artwork at the intended print dimensions. Resizing during production can change text readability, line thickness, and visual balance. Customers who know the required dimensions can order DTF transfers by size for consistent placement across different garment categories.
Understanding White Ink and Underbase Quality
White ink plays a critical role in DTF printing because it creates the foundation beneath the color layer. On dark garments, this underbase keeps colors bright and prevents the fabric from showing through the artwork.
An underbase that is too light may produce dull colors. An excessive white layer can make the transfer feel heavy or stiff. The goal is balanced opacity that supports the design without adding unnecessary thickness.
White ink must also remain properly mixed and circulated in production systems. Sedimentation can cause inconsistent coverage, clogged printheads, or uneven white areas. Print shops producing their own transfers should follow the printer and ink manufacturer’s maintenance recommendations.
Building Efficient Gang Sheets
A gang sheet places multiple designs on one larger transfer sheet or roll section. This allows businesses to use film more efficiently and organize several logos, names, sleeve prints, tags, and full-size graphics in one production file.
A well-organized gang sheet can reduce transfer cost per design, improve order preparation, and simplify repeat production. However, designs must be spaced correctly so they can be cut apart without damaging nearby artwork.
Best Practices for Gang Sheet Layouts
- Leave enough cutting space between each design
- Keep artwork at its final print dimensions
- Remove unnecessary transparent space
- Group similar order sizes together
- Check every design for resolution and background issues
- Confirm that no artwork overlaps another design
- Use available sheet space without crowding the layout
The DTF gang sheet builder allows users to arrange multiple graphics within a defined print area. This is useful for apparel brands, teams, schools, event orders, and businesses producing several garment placements at once.
Choosing the Right DTF Transfer Size

Correct sizing is essential for visual balance. A design that is too small may look lost on the garment, while an oversized transfer can feel uncomfortable or extend too close to seams and edges.
| Placement | Common Starting Size | Recommended Use |
|---|---|---|
| Left Chest | 3–4 inches wide | Logos, staff uniforms, brand marks |
| Adult Front | 10–12 inches wide | T-shirts, sweatshirts, promotional apparel |
| Adult Back | 11–13 inches wide | Large logos, event designs, team graphics |
| Youth Front | 7–9 inches wide | Children’s shirts and school apparel |
| Sleeve | 2–4 inches wide | Small logos, flags, names, sponsor marks |
| Neck Label | 2–3 inches wide | Brand labels and garment information |
These measurements are starting points rather than strict rules. Garment size, artwork shape, customer preference, and intended placement should all be considered. A tall vertical design and a wide horizontal logo may require different dimensions even when used in the same location.
Film, Powder, and Curing Fundamentals
Consistent DTF production depends on compatibility between the film, ink, adhesive powder, printer settings, and curing method. Materials should not be selected only by price. Poor compatibility can lead to uneven powder coverage, dull color, weak adhesion, oily surfaces, or difficult peeling.
Film Quality
The coated film must accept the printed ink cleanly and release the finished design according to its intended peel method. Some films are designed for hot peel, warm peel, cold peel, or multi-peel application. Operators should never assume the peel method based only on the appearance of the carrier.
Adhesive Powder Coverage
Adhesive powder must cover the complete wet ink layer. Missing powder can create weak sections, while excessive residue around the artwork may leave unwanted adhesive marks after pressing.
After powder application, remove loose material carefully. The goal is an even adhesive layer attached only to the printed areas.
Proper Curing
Curing melts and stabilizes the adhesive powder before the transfer is applied to a garment. Undercured powder may remain grainy or fail to bond correctly. Overcuring can change the adhesive behavior, affect color, or make the transfer more difficult to press.
The correct curing temperature and time depend on the materials and equipment. Follow the product manufacturer’s instructions rather than applying one universal curing setting to every film and powder combination.
Preparing the Garment for Pressing
Garment preparation is one of the most overlooked parts of Mastering DTF Printing. Even a perfectly produced transfer may fail when applied to a damp, wrinkled, coated, or uneven surface.
Inspect the Fabric
Check the garment composition and care label. Cotton, polyester, blends, nylon, performance fabric, and coated materials can react differently to heat. Test unfamiliar garments before pressing a completed customer order.
Pre-Press the Garment
Pre-pressing for approximately two to five seconds removes surface moisture and wrinkles. This creates a smoother area for transfer placement. Avoid over-preheating heat-sensitive polyester because prolonged exposure can increase the risk of shine or dye migration.
Avoid Seams and Obstructions
Collars, pockets, seams, zippers, buttons, and drawstrings can interfere with pressure. Use a pressing pillow or pad to raise the application area when necessary. The upper platen should contact the complete transfer evenly.
Recommended Heat Press Starting Points
Heat press settings vary by transfer and garment. The transfer supplier’s instructions should always take priority. The following table provides general starting ranges for testing.
| Fabric | Temperature | Time | Pressure |
|---|---|---|---|
| 100% Cotton | 300–320°F | 10–15 seconds | Medium |
| Cotton-Polyester Blend | 285–310°F | 10–15 seconds | Medium |
| 100% Polyester | 270–290°F | 8–12 seconds | Light to medium |
| Performance Fabric | 265–285°F | 8–12 seconds | Light to medium |
| Hoodies | 300–320°F | 12–15 seconds | Medium to firm |
Use these ranges only as a testing guide. Film type, adhesive, garment coating, machine accuracy, and peel instructions can all change the final settings.
Hot Peel, Warm Peel, and Cold Peel
The peel method determines when the carrier film should be removed after pressing.
Hot Peel
Hot-peel transfers are removed immediately or shortly after the press opens. They support fast production, but the film should be peeled smoothly and consistently.
Warm Peel
Warm-peel transfers rest for a few seconds before removal. This short cooling period can help stabilize the design while maintaining an efficient workflow.
Cold Peel
Cold-peel transfers must cool before the carrier is removed. Peeling too early may lift part of the design. Follow the exact instructions supplied with the transfer rather than guessing based on previous products.
Why the Finishing Press Is Important
After the carrier film is removed, cover the design with parchment paper, kraft paper, or an approved finishing sheet. Press again for approximately five to ten seconds or according to the supplier’s directions.
The finishing press can improve:
- Edge adhesion
- Surface texture
- Wash durability
- Flexibility
- Overall appearance
Different cover sheets can produce different finishes. A smooth sheet may create more shine, while a textured sheet can produce a more natural fabric-like appearance. Test finishing materials before using them on a full order.
Common DTF Printing Problems

Edges Lift After Pressing
Lifting edges may indicate insufficient heat, pressure, or pressing time. Moisture and uneven platen contact can also cause weak adhesion. Pre-press the garment and check whether seams are preventing complete pressure.
Part of the Design Stays on the Film
This problem can happen when the film is peeled too early, the transfer is under-pressed, or pressure is uneven. Return the film to its original position and repress briefly before trying again.
Colors Look Dull
Dull colors may result from weak white ink coverage, incorrect artwork settings, low-quality materials, insufficient curing, or excessive heat. Compare the artwork, printed film, and pressed result to identify the stage where the color changed.
White Areas Change Color
This is often dye migration from polyester fabric. Lower the pressing temperature and time, test the garment, and use transfers suitable for dye-sensitive materials.
The Transfer Feels Too Thick
A heavy feel may come from excessive white ink, too much adhesive, oversized solid artwork, or an unsuitable finishing process. Artwork with large solid backgrounds will naturally feel heavier than separated design elements.
The Print Cracks After Washing
Cracking may be caused by incomplete adhesion, overcuring, excessive heat, poor material compatibility, or incorrect garment care. Review the full workflow instead of changing only the press temperature.
Creating a Reliable Quality-Control Process
Quality control is essential for Mastering DTF Printing. Every production batch should be checked before transfers are shipped or applied to customer garments.
A practical inspection should include:
- Confirming artwork dimensions and orientation
- Checking colors and white underbase coverage
- Inspecting powder distribution
- Looking for scratches, pinholes, or missing details
- Verifying the correct peel method
- Testing adhesion on a sample garment
- Stretching the design after cooling
- Completing wash tests for new materials
Keep a production log for transfer type, garment composition, temperature, time, pressure, peel method, finishing press, and results. Documenting successful combinations reduces guesswork on repeat orders.
Improving Production Efficiency
Efficient production does not mean rushing every stage. It means organizing the workflow so operators can complete orders consistently with less waste and fewer corrections.
Standardize Artwork Review
Use a checklist for resolution, dimensions, transparency, spelling, colors, and design placement. Catching problems before printing is faster and less expensive than reprinting a full gang sheet.
Group Similar Orders
Press garments with similar materials and settings together. This reduces repeated temperature and pressure adjustments and lowers the chance of applying cotton settings to polyester garments.
Label Transfers Clearly
Mark each transfer with the order name, size, placement, garment type, and pressing instructions when appropriate. Clear organization is especially important when multiple team members share production responsibilities.
Maintain the Heat Press
Check platen temperature accuracy, pressure consistency, pad condition, and machine cleanliness. An inaccurate or uneven press can create repeated failures even when the transfer itself is correct.
DTF Transfer Care Instructions
Allow the finished garment to cool before folding or packaging. Waiting approximately 24 hours before the first wash gives the adhesive bond time to stabilize.
Recommended customer care instructions include:
- Turn the garment inside out before washing
- Use cold or warm water
- Choose a mild detergent
- Avoid bleach and harsh chemicals
- Use low-temperature drying or air dry
- Do not iron directly over the design
Clear care instructions help customers protect the garment and reduce avoidable complaints related to high-temperature washing, aggressive drying, or direct ironing.
Final Thoughts on Mastering DTF Printing
Mastering DTF Printing is a combination of technical knowledge, reliable materials, accurate artwork, controlled pressing, and repeatable quality checks. Strong results begin before the transfer reaches the heat press. File preparation, gang sheet layout, sizing, film, powder, curing, and garment selection all influence the final product.
Start with tested settings, follow the supplied application instructions, and adjust one variable at a time. Record successful results for each garment and transfer combination. This approach helps print businesses reduce waste, protect profit margins, and deliver consistent apparel across small custom orders and larger production runs.
For custom transfer services, visit Custom Print AZ. You can also organize multiple designs with the DTF gang sheet builder or order DTF transfers by size for specific apparel placements.
Frequently Asked Questions
What is the most important step in mastering DTF printing?
Consistent quality control is the most important step. Artwork, transfer materials, curing, garment preparation, and pressing conditions must all be checked because a problem at any stage can affect the finished product.
What file type is best for DTF printing?
A high-resolution PNG with a transparent background is commonly used for raster artwork. Vector formats such as AI, EPS, or PDF can also work well when they are prepared correctly. Files should generally be created at 300 DPI and final print size.
Can DTF transfers be applied to cotton and polyester?
Yes. DTF transfers can be applied to cotton, polyester, blends, and many other compatible fabrics. Polyester usually requires lower heat and shorter pressing times to reduce dye migration and press marks.
What is a DTF gang sheet?
A DTF gang sheet combines several designs on one larger print area. It helps reduce unused film, organize multiple transfers, and lower the production cost per design.
How much space should be left between gang sheet designs?
Leave enough room to cut each design without damaging nearby artwork. The exact spacing depends on the cutting method, but clear separation should remain around every graphic.
Why should a garment be pre-pressed?
Pre-pressing removes moisture and wrinkles from the application area. This creates a flatter surface and helps the adhesive bond more evenly with the garment.
Why is my DTF transfer lifting?
Lifting may be caused by insufficient temperature, pressure, or pressing time. Moisture, uneven platen contact, incorrect peeling, and incompatible fabric coatings can also contribute to the problem.
Does every DTF transfer use the same heat settings?
No. Settings vary according to film, powder, ink, garment material, and transfer manufacturer. Always follow the instructions supplied with the transfer and test unfamiliar fabrics.
Is a finishing press necessary?
A finishing press is strongly recommended because it can improve edge adhesion, texture, flexibility, and wash durability. Use a suitable cover sheet and follow the recommended finishing time.
How long should customers wait before washing a DTF-printed garment?
Waiting approximately 24 hours before the first wash is generally recommended. The garment should be washed inside out with mild detergent and dried using low heat or air drying.


